We have to do it with a bittersweet second place. Maybe another time, we were patient the last 32 as well. Ah, at least we had a good time, and that's what matters. Another enjoyment for this week is a second Follower on this blog. I'm glad people are still reading. It's quite a job to create a story and some visuals each week, and I'll have to admit it even brings some stress sometimes on Sunday. "Come to bed honey". "Just 5 minutes, I'm finishing my story!". And before you know it's past 00:00 again. No one judges or gives me deadlines, but this works like doing a diet. As soon as you start skipping or finding excuses, the whole thing will collapse sooner or later. "Must-write-some-thing". So, it really encourages to see people are reading or giving feedback.
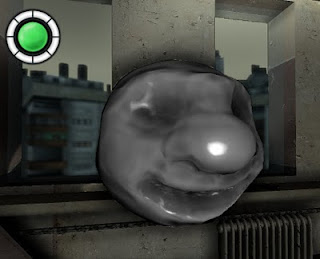
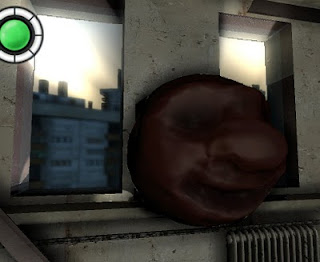
Made a (retarded)Smiley model for testing purposes. First it is rendered with default lighting (Lambert, Blinn). On the right side a "red clay" material is applied, inspired on those cool ZBrush shaders. So how did we give the clayish look?
Ok, so what happened last week? If you had a careful look at the monster from the previous post, you might notice it's skin doesn't really look... skinny. Of course, there are plenty of ways to improve that. Draw a better texture, use another (detail)normalMap, tweak some parameters, and so on. But also the lighting plays an important role here. If you ever wrote a shader, you probably know the basic formula's to calculate Diffuse and Specular lighting the "Lambertian" and "Phong"/"Blinn" way:
   diffuseTerm = dotProduct( lightVector, surfaceNormal )
   halfAngle = normalize( lightVector + eyeVector )
   specularTerm = pow( dot(halfAngle, surfaceNormal ) , shininess )
If those are hieroglyphics for you, try to think of it like this. When light hits an object, it can get scattered into all directions due a rough surface (on microscopic levels), or it reflects straightly. Very diffusive materials are concrete, chalk or sand. Specular materials on the other hand could be metal, plastic or a mirror (perfect specular).
The basic lighting formula can be tweaked to some extent by giving it less or more specular, but it lacks on rendering more specific materials such as brushed metal, satin, clay or flesh. There are plenty of demo's that use alternative techniques such as BRDF, anisotropic lighting, Oren Nayar, and so on. However, smoothly implementing them into an engine isn't so easy. Especially not if you are doing Deferred Lighting like I do. Deferred what?
I won't go into detail, but Deferred Lighting basically renders the material properties of each pixel into a few target textures. Later on, the volumes of lights that affect your screen are placed on top and will use the pixel properties to do their lighting.
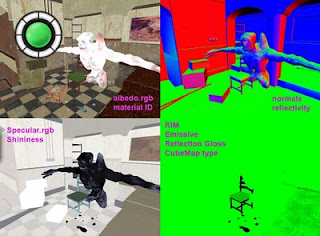
Four funky textures used for the Deferred Lighting process. Ow, if you wonder how I do transparent surfaces; good old forward rendering
When rendering the light volumes, you won't know what kind of material you are affecting unless the textures have information about it. The problem is that the amount of values is limited with Deferred Lighting (16 scalars in my case), so you can't pass big formula's or image data. On top, the lighting shader shouldn't be branching ( IF
To fix these problems, I decided to use a Material-Lookup-Texture. Within this 2D texture, I can define up to 63 materials. Wood, chalk, gold, metal, clay, velvet, slime, poop, whatever. Each material has a section inside that (atlas) texture where it's Diffuse, Specular, RIM and Fresnel settings are stored. Possibly more parameters to come. The lookup coordinates will depend on the results of the basic lighting formula and the materialID that is stored in the Deferred textures. This
ID simply shifts the coordinates into one of the 64 regions.
   // To the basic stuff
   diffuseTerm = dotProduct( lightVector, surfaceNormal )
   halfAngle = normalize( lightVector + eyeVector )
   specularTerm = pow( dot(halfAngle, surfaceNormal ) , shininess )

   // Instead of using the results above, override them by peeking in our material texture
   Texcoords.x = diffuseTerm * scaleX + materialID_shiftX;
   Texcoords.y = specularTerm * scaleY + materialID_shiftY;

   // Go Gadget go
   materialData = tex2D( materialTex, texcoords );
   newDiffuse.rgb  = materialData.rgb;
   newSpecular.rgb = newDiffuse.rgb * materialData.a;
   // Same thing for RIM and Fresnel
This allows to use alternate lighting without expensive shader techniques or scarifying many material parameters in the Deferred Rendering pipeline. Since the lookup textures contain 2D data, it's also possible to make "weird" specular highlights or colorize the diffuse lighting. Think about satin or rainbow effects on glass/CD's.
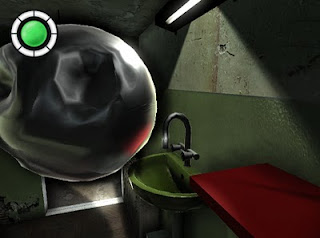
Basic metal material applied here. Much specular lighting, almost no diffuse lighting. The glossy reflection is made with a blurred cubeMap and high frequency normal disturbance. More important, the ugly greenish bathroom setting (not finished yet) is inspired on "google images: Soviet bathroom". Always price if you type "Soviet" in front.
The only remaining problem is... How in st.Beards name do we define those lookup textures? I have about two options:
A.- Buy or make myself a, Jesus Christ, gonioreflectometer. These devices will measure reflecting light on a piece of surface from all kinds of angles.
B.- Draw the (gradient) textures myself, physically based on absolutely nothing.
So I chose the second approach. Since my paintwork are just wild guesses, I made a few tools that will compose the Atlas lookup texture and renders the results for a quick review though. All in all I'm not 100% happy yet, and the specific lighting results are pretty much washed out after combining them with plenty of other tricks (texturing, ambient light, reflections, SSAO, screen filters, and so on). but at least alternate lighting is integrated into the (Deferred Lighting) engine pretty smoothly now, for a rather low cost.
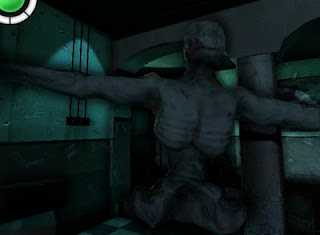
My floating "Segway" kinda like monster again, with a slightly new jacket. More diffuse, less shadow. Furthermore, the red edges are the results of RIM lighting, which appears when a light is shining right behind an object. It may be overdone here, but it somewhat simulates the skin translucency. In the meanwhile, I'm making the big brother of this character for the movie... Let's hope it looks somewhat more frightening.

No comments:
Post a Comment