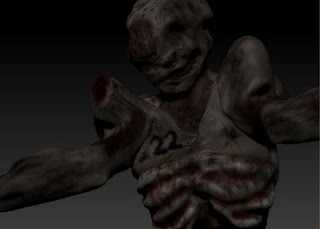
Besides bringing down the polycount alone, I also had to fix the UV seams. For those who are unfamiliar with UV coordinates; to get that nice texture on your model, you'll have to make a flat 2D "unwrap" of it. Each polygon should have a place somewhere on the 2D canvas. In many cases without overlapping the space of other polygons. In practice that means each vertex gets a 2D "UV" or "texture" coordinate as well, besides its 3D position. These coordinates tell where the polygon pixels can be found on an image.

There are several methods for making such an unwrap, including doing it fully automatic. The trick it to optimally use the 2D canvas. The bigger the area the polygons spread, the more pixels it will use in the result rendering. Blabla, one of the difficulties with making unwraps are the seams. Imagine you want to texture a cylinder model. You can roll it out as a carpet over the 2D canvas, but somewhere you'll have to make a cut. The green line on the fantastic model below shows an example.

Two difficulties arise here. First, when drawing at the right side of the Cola texture, you'll have to make sure the left side of the texture connects well. If the right side is slightly more red for example, you'll see an ugly obvious color transition on the 3D model. Luckily this is automatically solved for you when painting in 3D. Programs like Sculptris or ZBrush have some really good tools that let you directly draw onto the 3D model. So you don’t have to care about where to draw on a 2D canvas. Afterwards you can do the fine detail stuff with a painting program. But, stay careful at nearby by the seams.
Another issue with seams are, well, the seams. A typical 3D mesh contains groups, (triangulated) polygons and vertices. Each group has a bunch of polygons, each polygon refers to (3) vertices, and finally there is the vertex itself which is usually a structure of 3D vector data: 3D position, 2D uv coordinate, 3D normal vector, and maybe some other stuff such as weights or tangents. Here lies a problem... If a vertex has only one UV coordinate... then how the hell can it be on 2 places at the same time (see picture)? Vertex #23 (just a number) is both on the left AND the right side. When importing this model, big chance the renderer will chose either 1 of them, causing a big texturing error. The boob docter doesn't stich the wound with white tissue either when operating a black woman.

With the new upcoming winter fashion for 2010, we got him a new skin.
The answer is to duplicate the vertices at the seam. Make a copy with exactly the same 3D data, except for the UV coordinate. Voila. But how are you going to do that on a high-poly model that has a half million vertices aye? Luckily I found this handy plugin for Lightwave that does this automatically for you:
www.mikegreen.name/ <-- check plugins, "Split by Seams", thank you Mike!
The only bad news was that it took the plugin for about 3 hours to fix the high-poly model. And then to find out you forgot something. Oops, just a moment. All in all, bringing the high-poly model to the engine was quite a ride:
1.- Model mega high-poly.
2.- Reduce to ~200.000 polys or something. I'll had to do this because my 32 bit machine would ran out of memory with some of the plugin operations on the mega model.
3.- Make an UV unwrap.
4.- Draw a skin on the 3D model. Generate a high-res texture (2048 x 2048 or something). You can always downscale that texture later on.
5.- Export the high poly model to something Lightwave can read.
--------- part deux -------------
6.- Import the high-poly model.
7.- Make a low-poly mesh (3.000 for example) with a plugin like these:
SimplifyMesh
DO NOT FIX THE SEAMS ALREADY! Or you will get gaps and holes at the seams in
the low-poly mesh.
8.- Fix the seams on the High AND the Low poly meshes with a tool like :
8.B- Wash your car, brush your teeth, do something nice with your family, and be patient.
9.- Generate a normalMap by looking at the high poly mesh with a plugin like Mike's UV seam fixer.
generateNormals
10.- Send the high-poly model to your grandma in a postcard, dump it.
11.- Now you have a textured low poly model, with a cool normalMap.
Hey, I'm not a really good modeler, but knowing your tools can bring you quite far!

Funny. After quickly putting this head together in about an hour, I didn't really know what to do with it... sick, or just trash? Then my girlfriend suddenly woke up around 02:00 and was shocked to death by my laptop screen. Haha, but she was really worried about the crap going on in my head, especially at that time. What better compliment can you get when trying to make something, boo, scary?

No comments:
Post a Comment